Difference between revisions of "Chapter 3 - System Setup 4.0"
(→Software Installation Procedure) |
(→Software Installation Procedure) |
||
| Line 127: | Line 127: | ||
To install halFILE on your system, use the following procedure: | To install halFILE on your system, use the following procedure: | ||
| − | # To install the Prerequisites required for halFILE 4, go to [http://update.halfile.com] and click the Prerequisites for halFILE 4.0 link. Follow the instructions for installing the .NET Framework 4.0 and Crystal Reports 2010 Runtime. | + | # To install the Prerequisites required for halFILE 4, go to http://update.halfile.com [http://update.halfile.com] and click the Prerequisites for halFILE 4.0 link. Follow the instructions for installing the .NET Framework 4.0 and Crystal Reports 2010 Runtime. |
# Insert halFILE Installation CD into the appropriate drive or download setup.exe from the halFILE Update Service. | # Insert halFILE Installation CD into the appropriate drive or download setup.exe from the halFILE Update Service. | ||
# Display the Run... option from the File menu in the Program Manager, and enter the following at the command line:<blockquote>'''d:\setup'''</blockquote>where d: is the drive containing the CD. | # Display the Run... option from the File menu in the Program Manager, and enter the following at the command line:<blockquote>'''d:\setup'''</blockquote>where d: is the drive containing the CD. | ||
Revision as of 13:31, 31 January 2013
Contents
- 1 SYSTEM SETUP
- 1.1 System Configuration
- 1.2 Networks Supported
- 1.3 Databases Supported
- 1.4 Installation Requirements
- 1.5 Preparing the Hardware and Software Components
- 1.6 Software Installation Procedure
- 1.7 Additional Drivers
- 1.8 halFILE Menu Structure
- 1.9 Viewing the help file
- 1.10 Exiting halFILE
- 1.11 Registration
- 1.12 Running halFILE for the first time
SYSTEM SETUP
This section specifies the system configuration and operating requirements for halFILE. It also discusses the procedure for installing the software and preparing the system to be used. A quick overview of how to set up halFILE is as follows:
- Prepare hardware and software components for the installation
- Install halFILE
- Define an application
- Design a database
- Define electronic in-baskets
- Define drives available for permanent image storage
- Define cartridges where documents are stored
System Configuration
Minimum Workstation System Requirements
Windows 7 Professional or Ultimate or Windows 8 Pro or Enterprise
- 2.4 GHz or faster 32-bit (x86) or 64-bit (x64) processor
- 1 GB (32-bit) or 2 GB RAM (64-bit)
- DirectX 9 graphics device with WDDM 1.0 or higher driver
- 200 GB hard drive with at least 5 GB of available space
- Download and install the following pre-requisites from http://update.halfile.com/
- Microsoft .NET Framework 4 – Extended Profile
- Crystal Reports .NET RuntimeSuper VGA (1152 × 864) or higher-resolution video adapter
Windows XP Pro SP3
- Pentium 4 - 2.4 GHz or faster CPU
- 512 MB RAM
- DirectX 9or higher graphics device
- 200 GB hard drive with at least 5 GB of available space
- Download and install the following pre-requisites from http://update.halfile.com/
- Microsoft .NET Framework 4 – Extended Profile
- Crystal Reports .NET
Note: Microsoft will end support for Windows XP on August 4, 2014. We strongly recommend upgrading to Windows 7 or higher.
Recommended Workstation System Requirements
- Windows 7 Professional or Ultimate
- 3 GHz 64-bit (x64) processor
- 4 GB RAM
- 500 GB hard drive with at least 50 GB of available space
- Download and install the following pre-requisites from http://update.halfile.com/
- Microsoft .NET Framework 4 – Extended Profile
- Crystal Reports .NET Runtime
Note: Crystal Reports 9.x or higher is required to design reports.
Recommendations Terminal Servers
- 3.0 GHz or faster CPU
- Multiple processors recommended (10 users per processor)
- 4 GB RAM or more (32MB per user or greater)
- 320 GB or greater hard disk (for OS – does not include on-line document storage requirements)
- RAID 1, 5, 10 or mirrored drives highly recommended
- 100/1000 Base-T Network Interface Card
- Download and install the following pre-requisites from http://update.halfile.com/
- Microsoft .NET Framework 4 – Extended Profile
- Crystal Reports .NET RuntimeSuper VGA (1152 × 864) or higher-resolution video adapter
Recommendations Database Servers
- Dual processor or dual core
- 8 GB RAM
- 2 TB hard drive
- SQL Server 2008R2 (SQL 7 and SQL 2000 are no longer supported)
- 64-bit OS
Recommendations Image Servers
- Dual processor or dual core
- 8 GB RAM
- RAID5 according to image needs including future expansion
- Windows Storage Server 2008
- 64-bit OS
Other Components
- For scan workstations, a compatible scanner is required (Appendix I lists compatible scanners, scan cards, and software engines. This includes Kofax hardware and software engines, SCSI scanners and ISIS and TWAIN scanners.
- If user-designed database reports are desired, Crystal Reports 9.0 or above is required.
- For XP Stations or if OCR is desired, Imaging Professional for Windows 2.6, 2.8 or 4.0 (or later) is required. This can be obtained from hal Systems Corporation. Contact your sales representative for more information.
- If Barcode recognition is desired, Kofax hardware or software engine is required.
All of the previous components are available through hal Systems Corporation.
Networks Supported
The multi-user version of halFILE supports any Network system that can run Microsoft Windows 2000 or higher on a workstation. The product has been successfully certified on the following:
- Novell Netware 3.2 or above
- Microsoft NT Server 4.0 or above
- Microsoft Windows 2000/2003/2008 Server
Databases Supported
- Microsoft SQL Server 2012
- Microsoft SQL Server 2008
- Microsoft SQL Server 2005
- Microsoft SQL Server 2012 Express
- Microsoft SQL Server 2008 Express
- Microsoft SQL Server 2005 Express
Installation Requirements
halFILE requires approximately 100 GB of disk space.
Preparing the Hardware and Software Components
The following must be installed and tested successfully before halFILE can be installed:
- Microsoft Windows 7 or later
- Hardware cards (such as the KOFAX scanner card) as specified in your particular halFILE Imaging System configuration, into the computer.
- SQL Server.
- Microsoft .NET Framework 4.0 (available at the halFILE Update Service)
Software Installation Procedure
To install halFILE on your system, use the following procedure:
- To install the Prerequisites required for halFILE 4, go to http://update.halfile.com [1] and click the Prerequisites for halFILE 4.0 link. Follow the instructions for installing the .NET Framework 4.0 and Crystal Reports 2010 Runtime.
- Insert halFILE Installation CD into the appropriate drive or download setup.exe from the halFILE Update Service.
- Display the Run... option from the File menu in the Program Manager, and enter the following at the command line:
d:\setup
where d: is the drive containing the CD. - Follow the instructions displayed on your screen.
Note: The multi-user version of halFILE must be installed on every workstation where halFILE will be run to ensure the necessary driver files are copied to each station's local Windows folder. The halFILE folder for network systems should be a common network folder accessible by all stations and should be selected as the target folder for the installation of halFILE on ALL stations. DO NOT TAKE THE DEFAULT TARGET FOLDER FOR NETWORK INSTALLATIONS.
Once the installation process is complete, a halFILE group is created that includes the halFILE icon shown to the right. Double clicking on this icon loads halFILE. ![]()
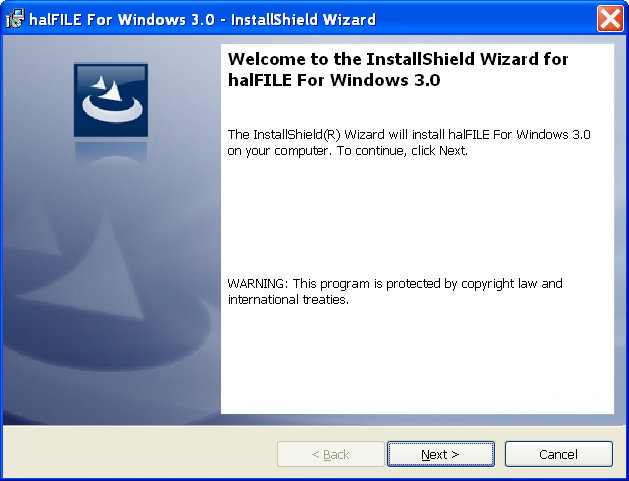
The following shows the installation screens.
Step 1: Welcome screen – click Next.
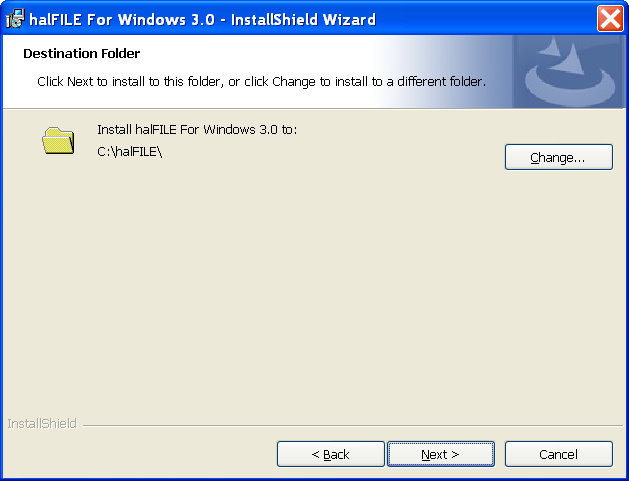
Step 2: The default target folder is shown. If this is not correct, click Change and select the folder where halFILE should be installed. NOTE: For network systems, the target folder should be a shared folder on a network drive accessible to all halFILE users.
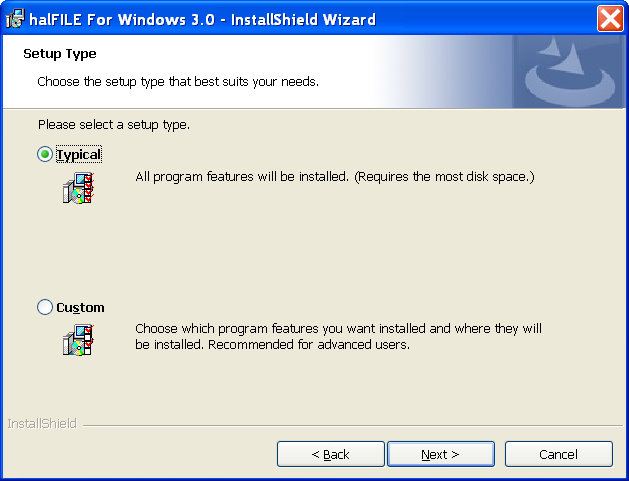
In almost all cases choose the typical install.
Screen shot of the typical install setup screen.
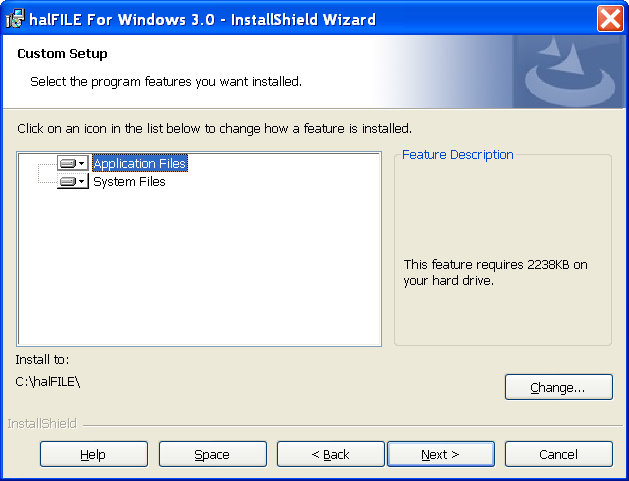
Screen shot of the custom install setup screen.
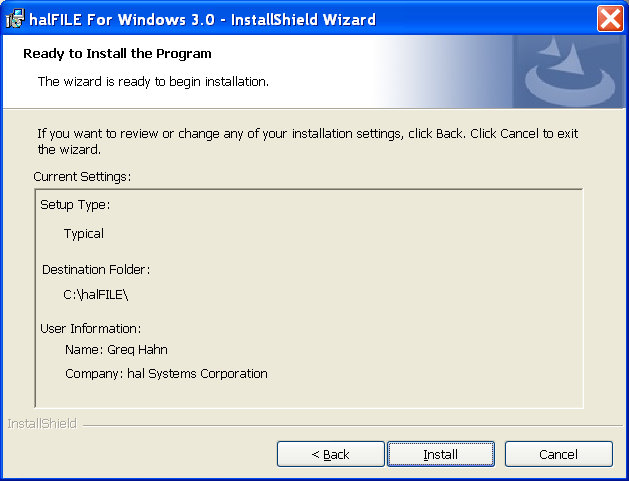
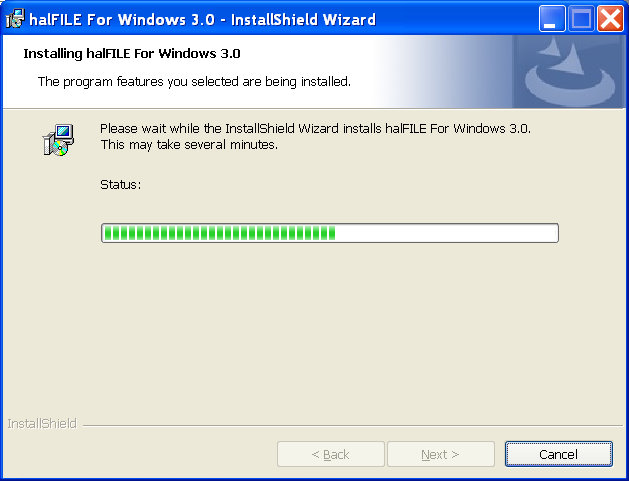
A screen shot of the halFILE installer during the install process.
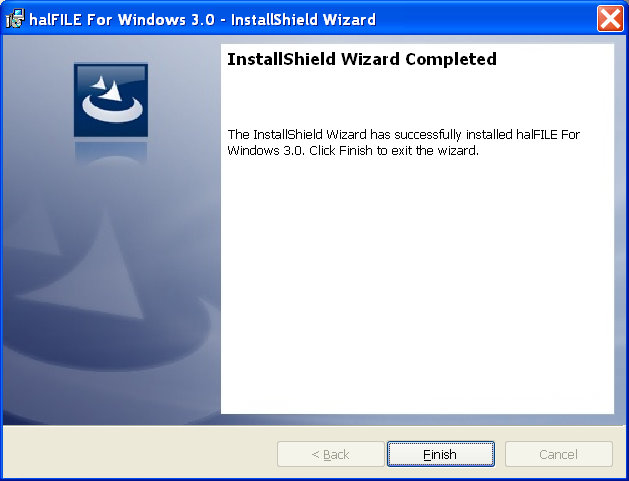
Click the Finished button.
When the complete screen is displayed, halFILE is ready to use. For database platforms other than SQL Server, database ODBC drivers may need to be installed separately.
Additional Drivers
Video Scanner Drivers
Video scanners are supported with drivers that are shipped with all Kofax Adrenaline hardware cards. Video drivers can also be downloaded to support older Kofax KF-Series hardware cards. The basic halFILE scan program, HFSCAN32.EXE, supports these drivers.
ISIS Scanner Drivers
ISIS Scanner drivers are shipped with most SCSI scanners. halFILE can scan using these drivers and scanners with the installation of a Kofax hardware or software engine. The basic scanner program, HFSCAN32.EXE, supports these drivers.
TWAIN Scanner Drivers
TWAIN Scanner drivers are shipped with most SCSI scanners. halFILE can scan using these drivers and scanners. The scanner program to use is HFTWAIN32.EXE and is installed as part of halFILE. If Imaging Professional is installed, then HFTWAIN32PRO.EXE should be used.
halFILE Menu Structure
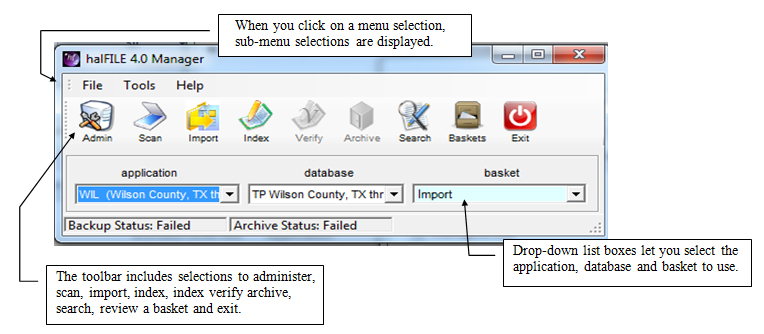
Below is the halFile Manager screen. halFILE uses a tool bar for frequently used operations. The screen below shows the first menu screen once the halFILE icon is double-clicked.
The selections across the top (File, Tools, Help) provide pull-down menu options. The nine icons below the menu provide fast selection for the commonly used functions including:
- The halFILE Administrator
- Scan
- Import
- Index
- Index Verify (this is grayed out unless the feature is enabled)
- Archive
- Search
- Review a Basket
- Exit
The pull-down list boxes let you choose applications, databases and baskets. Before clicking an icon, be sure the proper application, database and basket are selected.
Viewing the help file
Clicking on the help menu selection (ALT-H) displays several menu selections. The Help-Contents selection displays the help file\’s Table of Contents. Help-Index displays the index to the help file. Help-Search for Help On menu selection provides a way to search for keywords in the help file. The Help-Go to the Web (halfile.com) menu assumes you are connected to the Internet and loads www.halfile.com in the default browser. Help-About displays version information. At any point in halFILE, context sensitive help information can be viewed by pressing the F1 key.
Exiting halFILE
Selecting File-Exit or clicking the Exit icon closes halFILE.
Registration
The first time you run halFILE, you are asked to register the product. Please fill out the registration form and fax or mail it to the address shown on the form. You can then click the continue button to use halFILE. You will be sent a registration number to enter into the registration form that permanently registers your copy of halFILE. You have 30 days to register.
Running halFILE for the first time
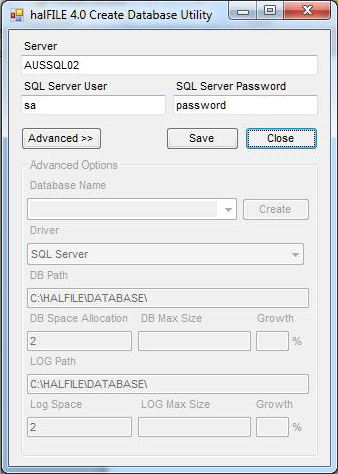
After halFILE is properly installed, the first time you go into the program you will be asked to define how halFILE will connect to your database engine in order to create the necessary databases. The screen below is used to define the Server, user id and password that should be used for this connection.
Note that the program that manages this information is CREATEDB.EXE. If your database server changes, you may need to use this utility to re-define the connection parameters.
If you wish to also define the server folder where databases will be created, you can click the Advanced>> button which activated the Advanced Options frame shown at the bottom of the screen above. Then select the driver from the drop-down list and designate the DB Path and Log Path, entering the service-side folder where new databases and log files are to be created. Then click the Exit button and save the information.
After the database connection information has been defined, the system displays a prompt asking you if you wish to create the parameters database. Answer yes to build this database.
